Christmas Ribbons Block
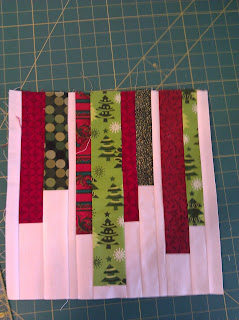
EASY! This block uses red and green fabrics over a white background.
Start with several strips of red and green, varying lengths and widths. I cut widths between 1.5 and 2.5 inches:
Cut white strips to match the green and red strips so that they add to (at least) 12.5 inches in length and sew them together:
You may want to group the strips, by inserting a couple of totally white strips. In this block there are three groups:
The idea is to have enough strips to total 12.5 inches wide. Do not forget to count the 1/2 inch sewing allowance for every strip!
Sew them all together and press:
Trim to 12.5 inch square:
That is the basic block, and that is all you NEED to do for December BOM. For those with more time on their hands, read on...
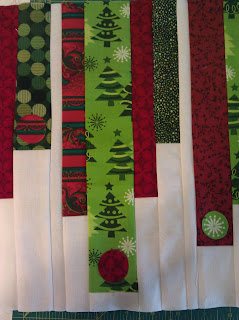
I decided to add a little extra, in the form of round appliques that simulate Christmas ornaments on the ribbons. I traced them using the edge of a spool:
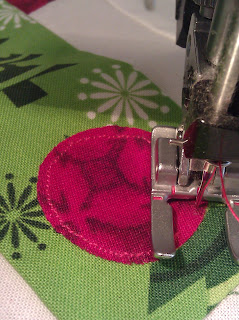
Then used a light fusible like WonderUnder to attach them to a couple of the ribbons and finally secured the edges with raw-edge applique method:
The three things to remember with this technique are (a) use as open a foot as you can so you can see where you are going, (b) use a very small stitch (I used 1 mm stitch length, the smallest my machine will allow) and (c) try to be close to the edge.
This is the finished block:
Finally, I thought it would be fun to try other applique shapes that look like Christmas ornaments. If you google "christmas ornament template images" you'll get more suggestions than you can handle. To use one, you need to download, print and resize the templates (with a copier or a graphic app) so they fit on a "ribbon". Or you could embellish the ornaments.
Have fun!


